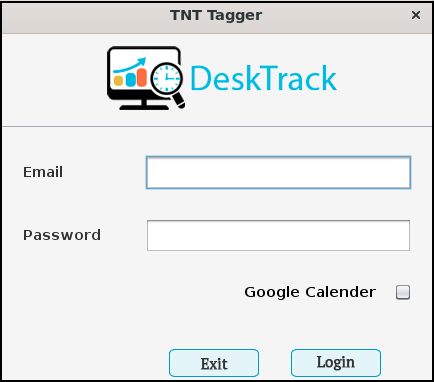
- Log in with your DeskTrack Id and Password.
- Now create a user(ignore if already created)
- Downloads the zip folder (DeskTrack Tagger)
- Unzip and open the folder
Open Terminal and run the following command.
- sudo su(enter)
- PC password
- yum install DeskTrack-1.66.5-1.el7.centos.x86_64.rpm (Tab) (enter)
- After some time it asks for Yes/No then press Y (enter)
- yum install libxdo-2.20110530.1-7.el7.nux.x86_64.rpm (Tab) (enter)
- yum install xdotool-2.20110530.1-7.el7.nux.x86_64.rpm (Tab) (enter)
- sudo bash /opt/TNTTagger/AutoScripts/Install_TNT_Cron.sh (Tab) (enter)Select the user in which you want to install the application and after that select the quit option to finish the installation
- chown -R root:root /opt/TNTTagger
- Wait for 2-3 minute the login window appears automatically
Now Login DeskTrack with User (employee) Id and Password
Note
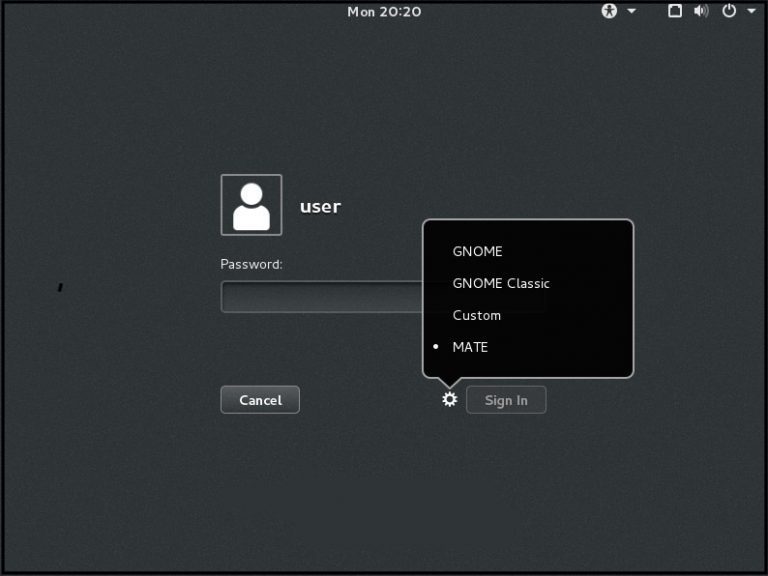
Tagger User’s machine should have the MATE version instead of GNOME, this help in showing the app logo in the system tray through which user can open the app, logout from the app, pause the app and Tag the apps, URLs, files to the desired project, module & tasks. To install Mate GUI follow the command;
- yum install epel-release -y
- yum groupinstall “Server with GUI” -y
- yum groupinstall “MATE Desktop”
- systemctl get-default
- systemctl set-default graphical.target
- systemctl get-default
- systemctl isolate graphical.target
Now restart the system and select the GUI as Mate
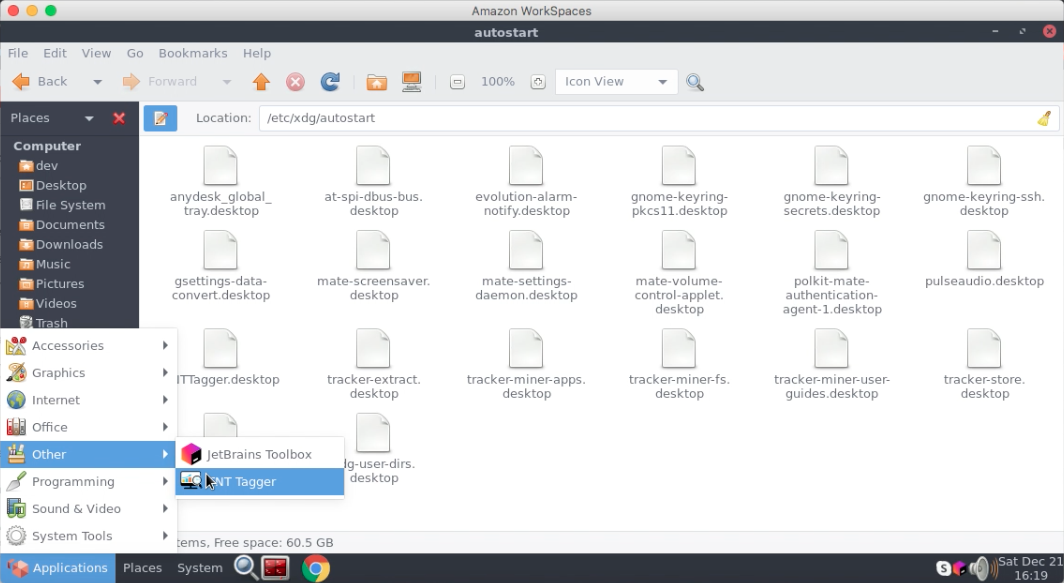
Now go to the applications —> Others—> TNTTagger and log in to the user.